

Introduction
Creating a website from scratch can often feel complicated, especially if you do not have coding knowledge or technical experience. Many people think they need to hire a developer or spend a lot of time learning complex tools before they can launch a professional website.
The process can become even more challenging when you need to choose a design, organize your pages, create the right layout, and make sure your website looks professional across different devices. For many beginners and small businesses, these technical steps can become a barrier to building an online presence.
With Webruno, the website creation process becomes much simpler. Instead of starting with a blank page or dealing with complicated setup steps, you can begin with a ready-made template and customize it based on your needs. Whether you want to build a business website, an online store, a portfolio, or a personal blog, Webruno provides the tools to help you create and manage your website more easily.
In this step-by-step tutorial, we will walk through the first stages of creating a website with Webruno. You will learn how to create your account, choose a website category, generate your first website, and customize the main design elements using the website builder.
This guide is based on the actual website creation process inside Webruno. We will show each step with screenshots from the builder so you can follow along and understand how each part works.
This is the first part of our Webruno website building tutorial. In the upcoming parts, we will cover more advanced customization options, including editing pages, adding new sections, and exploring additional features to help you create a complete website.
Step 1: Create Your Webruno Account
The first step in building your website with Webruno is creating your account. To get started, visit the Webruno website and open the website builder.
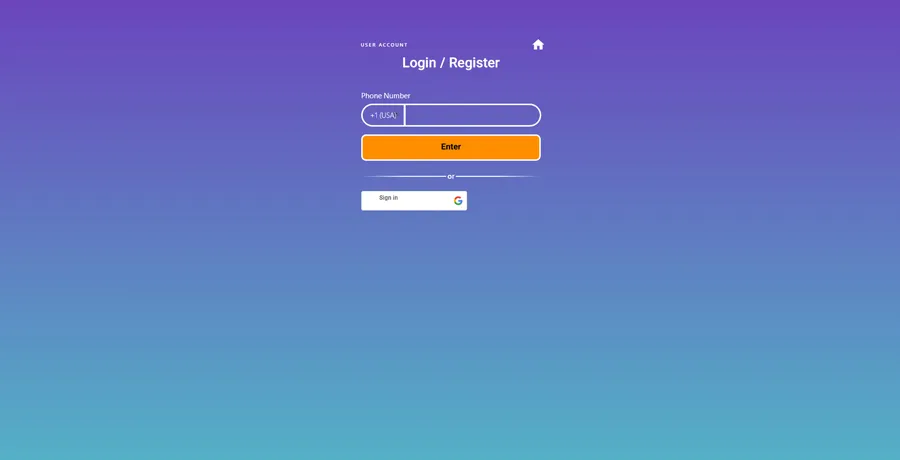
Click on the Start for Free button to begin. You can sign up using your phone number or continue with your Google account.
After completing the registration process, you will be taken to your Webruno dashboard. This is where you can start creating your website, choose a template, and manage your website building process.
Creating an account only takes a few moments, and no technical setup is required before you can start designing your website.
Step 2: Choose Your Website Type and Template
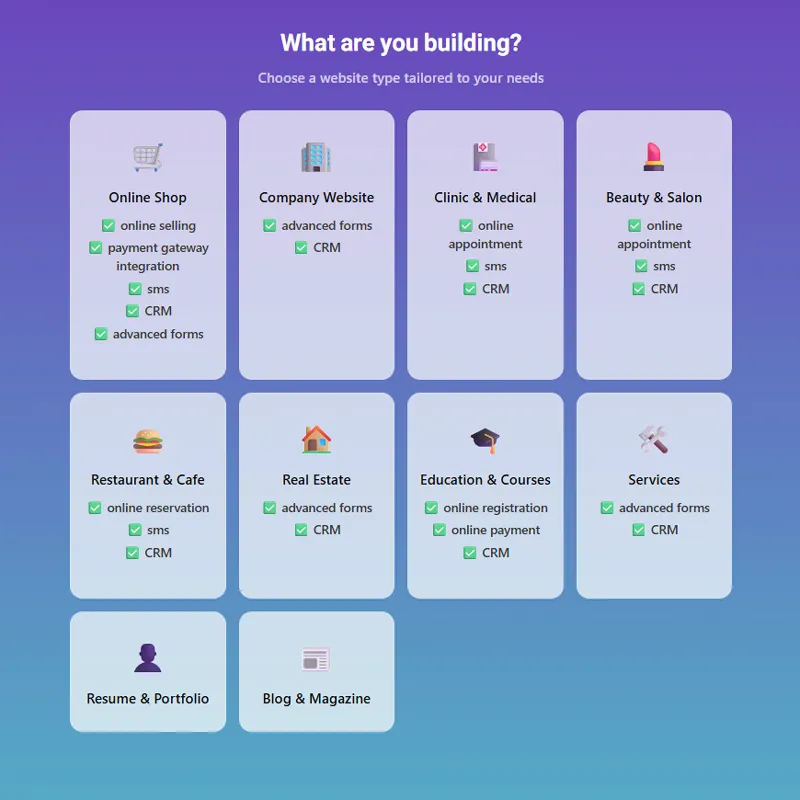
After creating your Webruno account, the next step is choosing the type of website you want to build. Webruno helps you start the process by asking what kind of website you need.
You can select a category based on your goal, such as:
- Business website
- Online store
- Portfolio
- Personal blog
This step helps Webruno create a more suitable starting template for your project. However, your choice is not permanent. The template is only a starting point, and you can customize the design, content, and structure later.
For example, if you want to create a portfolio website, Webruno will generate a design focused on showcasing your work. If your goal changes, you can still edit different sections and adjust the website based on your needs.
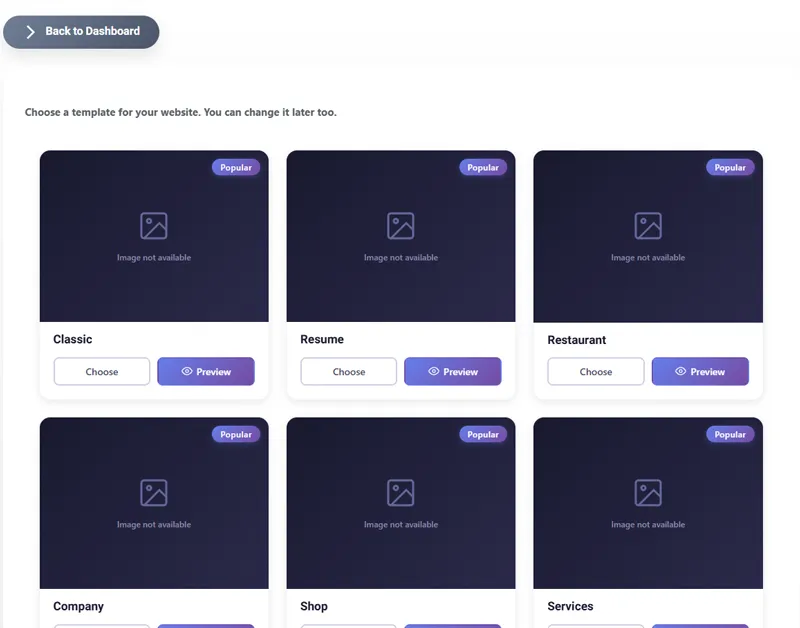
In this tutorial, we selected a portfolio template to start with. After choosing the template, Webruno prepares the initial website structure and moves you to the next stage of customization.
Step 3: Generate Your Website
After selecting your website category and template, Webruno creates the first version of your website automatically. Instead of starting with an empty page, you get a ready-made website structure that you can review and customize.
At this stage, you can preview your website and see how the selected template looks in a real environment. This allows you to check the overall design, layout, and structure before making further changes.
The generated website is only the starting point. You can continue editing different parts of your website, change the content, adjust the layout, and customize the design based on your brand or personal preferences.
During this step, you can:
- Preview your generated website
- Explore different template options
- Select the design that works best for your project
In this tutorial, after choosing the template, Webruno generated the initial website automatically, which gave us a base to start customizing the design in the next step.
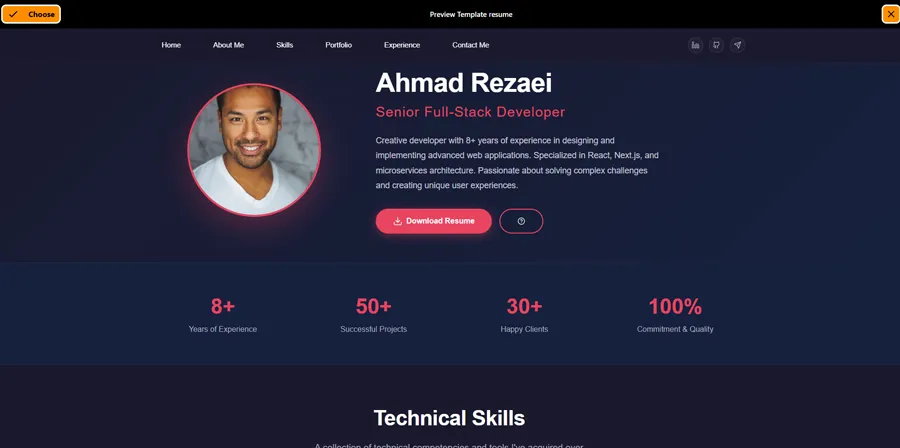
At this stage, you can preview your website and see how the selected template looks in a real environment.
Step 4: Customize Your Website Design
After generating your website, the next step is customizing the design and adjusting it based on your brand, content, and goals.
This is where you can transform the initial template into a complete website. Webruno provides a visual website builder that allows you to edit different parts of your website without writing code or dealing with complicated settings.
Inside the builder, you can modify the structure and appearance of your website by editing sections, changing text, adjusting layouts, and managing different elements of each page.
You can customize important parts of your website, including:
- Header and navigation menu
- Footer section
- Page sections
- Text and content
- Website layout and structure
The visual editor makes it easier to see your changes while building your website. Instead of making changes through technical settings, you can directly edit the page and adjust different elements based on your needs.
In this tutorial, we will explore how to customize the main parts of a website, including the header, footer, and the editing tools available inside the Webruno builder.
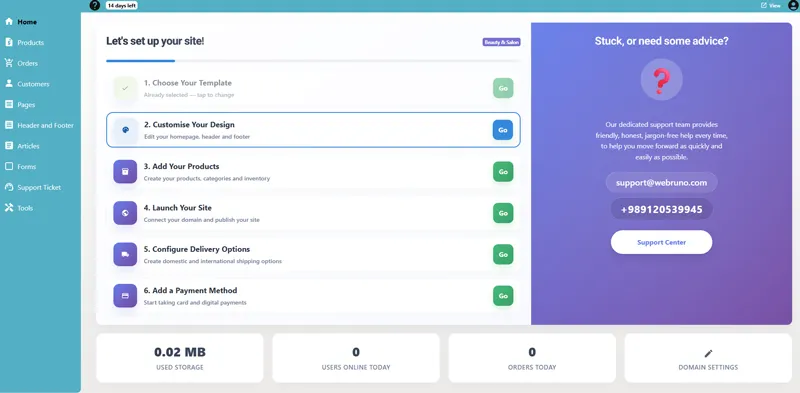
The Webruno website builder provides a visual editing environment where you can adjust different parts of your website and see changes while building.
Editing the Header
The header is one of the most important parts of your website because it is the first section visitors usually see when they open a page. A clear and well-organized header helps users understand your brand and navigate through your website more easily.
In Webruno, you can customize the header section based on your website needs. You can update different elements and adjust the layout to match your design style.
You can customize the header by:
- Changing your logo
- Editing the navigation menu
- Updating the top section design
- Adjusting the layout and position of elements
For example, you can replace the default logo with your own brand logo, change the menu items, or reorganize the header structure to make navigation easier for visitors.
A customized header helps create a more professional first impression and makes it easier for users to find important pages on your website.
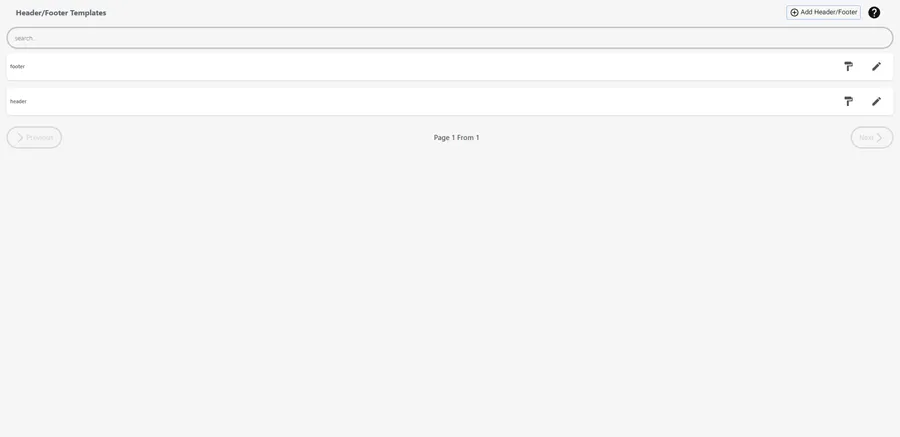
The Webruno editor allows you to customize key website sections, including the header and footer, by editing layouts, content, and different elements directly inside the builder.
Editing the Footer
The footer is the bottom section of your website and plays an important role in helping visitors find additional information after exploring your pages. It is usually used for important links, contact details, and other information that users may need.
With Webruno, you can customize the footer section based on your website structure and goals. You can edit different elements, including:
- Important website links
- Contact information
- Additional website details
- Other footer elements based on your design needs
A well-organized footer helps create a more professional website structure and makes it easier for visitors to access important information without searching through different pages.
Using the Website Builder Tools
After customizing the main sections of your website, you can use Webruno’s website builder tools to make additional changes and personalize your design.
The visual editor allows you to manage different parts of your website directly from the page. You can adjust the layout, update content, and move different elements without needing any coding knowledge.
With the Webruno builder, you can easily make changes such as:
- Drag and drop elements: Move sections and elements by dragging them to the position you want.
- Move sections: Rearrange different parts of your page to create a better structure and layout.
- Edit text: Update headings, paragraphs, and other content directly inside the editor.
- Undo changes: Reverse your previous edits if you want to return to an earlier version.
These tools make the customization process faster and easier. Instead of changing complicated settings, you can visually edit your website and see the results while building.
The ability to make real-time changes gives you more control over your final website design and helps you create a layout that matches your goals.
What You Can Build with Webruno
Webruno helps you create different types of websites depending on your goals. Whether you want to build an online presence for your business, showcase your work, or share your content, you can start with a suitable template and customize it based on your needs.
With Webruno, you can create:
- Business websites: Create a professional website to introduce your company, explain your services, and provide visitors with important information about your business.
- Online stores: Build an ecommerce website to showcase your products, organize your online store, and create a better experience for your customers.
- Portfolio websites: Create a portfolio to display your projects, skills, experience, and professional achievements in a structured way.
- Personal blogs: Share your ideas, knowledge, and content through a customized blog that matches your style and goals.
Each website starts with a ready-made structure that you can customize. You can update the design, edit content, and adjust different sections to create a website that fits your specific purpose.
Continue Learning (Part 2)
In this guide, we covered the first steps of creating a website with Webruno, including creating an account, choosing a website type, selecting a template, generating your website, and customizing the main design elements.
This is the first part of our Webruno website building tutorial. In Part 2, we will continue the process and explore more advanced customization options, including editing website pages, adding new sections, adjusting more design elements, and improving your website structure.
If you have completed these steps, you are now ready to continue refining your website and creating a more complete online presence with Webruno.
🔗 How to Build a Website with Webruno website builder + AI (Step-by-Step) | Episode 2
Watch the Full Tutorial Video
Prefer watching the process instead of reading the steps? You can watch the complete Webruno website building tutorial on YouTube and follow each step visually.
In this video, we show the first stages of creating a website with Webruno, including creating an account, choosing a website category, selecting a template, generating the website, and using the website builder tools to customize the design.
Watching the tutorial can help you better understand how each step works inside the Webruno platform and follow along while creating your own website.
Watch the full tutorial video on YouTube:
🔗How to Build a Website with Webruno (Step-by-Step Tutorial)
Frequently Asked Questions (FAQ)
Can I build a website with Webruno without coding?
Yes. Webruno allows you to create a professional website without writing code. The visual website builder lets you customize your website design, layout, and content using simple editing tools, even if you do not have technical programming experience.
How long does it take to create a website with Webruno?
The time depends on the type of website you want to create and how much customization you need. With Webruno, you can quickly generate a starting website by selecting a template and then improve it by editing the design, content, and different sections.
Can I customize my website after choosing a template?
Yes. A template is only the starting point for your website. After selecting a design, you can edit different sections, change text, customize the header and footer, move elements, and adjust the layout to match your brand or project.
What types of websites can I create with Webruno?
With Webruno, you can create different types of websites, including business websites, online stores, portfolio websites, and personal blogs. You can choose a suitable template and customize it based on your goals and requirements.
Do I need technical skills to use Webruno?
No. Webruno is designed for users who want to build and customize websites without dealing with complex coding or technical setup. The visual editor makes it easier to create and manage your website.
Can I change my website design after creating it?
Yes. You can continue editing your website after it is created. You can update content, modify sections, change layouts, and customize different elements whenever you need.